Replacing a Boring Sky - Part 2
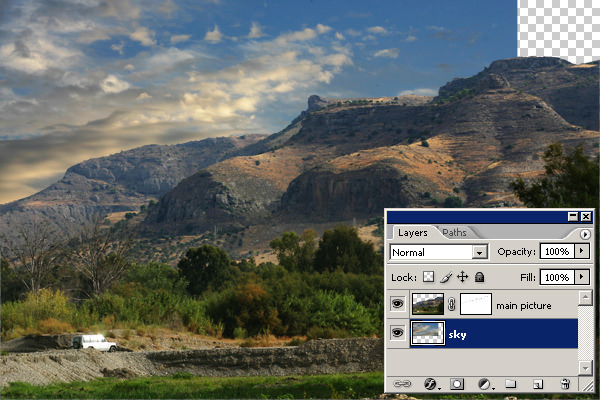
With the two pictures open in Photoshop, drag the sky picture into the main picture and Photoshop will automatically create a new layer for it. This layer will probably be on top of the main layer but you can drag the layer down in the layers palette so that the sky sits behind the main picture. I have moved the picture around so that I have an interesting bit of sky in the corner where I want it. The only two problems I have to solve now are, the picture runs out before the end of the main frame, and you don't normally see clouds that come quite so low in the sky.
The first thing to do is sample the blue color in the sky with the color picker' tool. This operation makes the color you choose the foreground color in the toolbox. Next make a new layer by choosing new on the 'layers palette' menu, fill it with the blue color, using 'fill' on the edit menu, and drag the layer to the bottom of the layer stack.
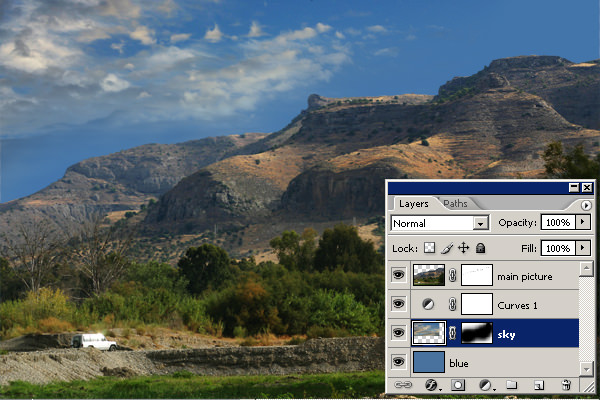
Now it's time to get 'arty' and blend everything together using a layer mask. With the sky layer selected, click on the 'layer mask' icon at the bottom of the 'layers palette Notice that when the layer mask is selected the colors in the toolbox change to black and white. If you paint onto the layer mask with black the layer beneath is revealed, so you can blend your clouds with your plain blue layer. If you make a mistake you can paint the mask with white to make it opaque again. Use a large soft brush to create a gradual blend. Looking at the layers palette in the picture above you can see what I've done. I also added a layer mask to the main picture to tidy up bits of the horizon that I didn't like.
You can see from this short example that the 'layers palette' is a very powerful tool, and the beauty of it is, it's all reversible non-destructive editing, which to a guy like me, who can never make his mind up, is really great.
Finally I have added a 'curves' adjustment layer to tweak the brightness and contrast in the sky so that it matches the landscape. see my Contrast tutorial for a quick introduction to curves.
If you enjoyed this page you might
be interested in my eBook
Learn Photography with Geoff Lawrence